BowerBird User Guide
The
best browsers for BowerBird are either Chrome or FireFox and you should be
using the latest versions of these web browsers. If you must use
Microsoft IE please download version 9. BowerBird using “bleeding edge”
software so its needs the latest browser updates.
The
BowerBird URL is: www.bowerbird.org,au
Join and Login
First:
“Join” register and then Log in to
BowerBird

When you
first open BowerBird you will see nothing as you need to create your own personal interface with BowerBird. By that I mean, you probably
do not want to see EVERYTHING happening on BowerBird so we invite you to
select which Projects or People or Organisations you
want to Join or Follow. Once you have joined
Projects or follow People, you will see everything that is added in your
selections. It’s a nice way to tailor your view of BowerBird.
Of
course, you can still opt to see EVERYTHING happening on BowerBird by clicking
the “Sightings” button on the top row:

We
have decided to build BowerBird
around Projects because that is where a citizen
science community of like-minded people sharing a common interest can gather.
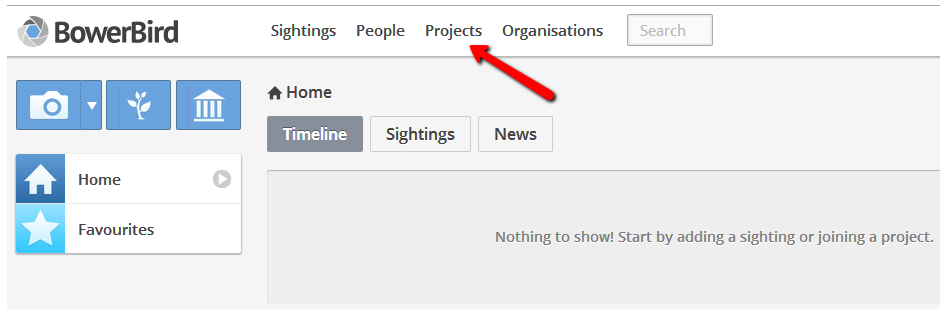
So, the
first thing you do when you enter BowerBird is to click the “Projects” and Join
some Projects.
Join some Projects or Organisations and Follow some BowerBird
Members
After you
have clicked the “Projects” button will be
presented with a list of existing Projects
that you can scroll through and click the “Join” button for any that take your
interest.
At
any time, you can go back
into Projects’ list and click to “Leave” a Project.
Below
you can see that I have Joined all of the Projects visible. The numbers
in the bottom left corner of each Project list

the number of People who have joined this Project and the second
number shows you how many observations have been uploaded to that Project.

Below
are some of the Projects I have Joined. There is a scroll bar on the
right side for you to scroll through your selected Projects.
Also,
here are some of the People I am currently following.
And
finally, I am a member of one Organisation.
This
is my personal view of BowerBird which will probably differ from anyone else on
BowerBird.


I
recommend you Join the “Butterfly Egg” project just for a look. Here I
have added egg images for 127 Australian butterfly species. Amazingly
complex little things!
Once
you have joined some Projects, click
your “Home” button you will have plenty to see!
Once you
have Joined a Project, you will automatically see any uploads that are sent to
any of your Joined Projects.
Creating
new Observations
After you
have Joined one or more Projects you can then begin
to create and add new Observations to BowerBird.
Just click
the Camera icon button (top left)

Which
will open the upload
template.

First,
you load images or sounds files or you link to existing videos on YouTube or
Vimeo.
To
add images, click the “Add Media” button and select “My Files”.

You
can add images individually or select them as groups.

BowerBird
will then show you how many images you have selected to upload and shows you an
image upload progress bar.

BowerBird’s default copyright setting is Creative Common 3.0 which means anyone can reuse your image with acknowledgement to you.
You can
change YOUR the default image license by editing your settings. Click
your name in the top right corner of the webpage and open “Edit Account
Details”

Then
scroll down to the “Licensing” section and make a selection. Once the
changes have been Saved, they then become your default license every time you
upload an image.

Once you
have uploaded an image, you can change the copyright license for individual
image by opening the arrow on each image and clicking “Edit Details”.

Here you
can add an image caption to the image and chose from any of 7 different
copyright statement from All Rights Reserved to various Creative Commons.

Once
your images have been uploaded and you have settled copyright issues, you then
add GPS coordinates.
Here
is a list of ways you can add GPS data:
1. You can enter the name of
a place (City, Town or even street name) and if it is in the Google library it
will automatically place your pointer at that spot.
2. You can click the “Drag
Pin” and place it on the map.
With both of these way, I suggest you then Expand
the Map, change to the satellite view and scroll to enlarge the view of the map
to refine your pin placement.

3. If you have GPS
coordinates for your locaity, click the Edit Coordinates:

Here
you can add coordinates as Decimal degrees, Degrees Minutes and Seconds or as
UTMs.

Finally,
to complete an observation upload, you need to select a Taxon category, Date
and which Project(s) you want add your observation to:


Once
you have saved the Observation, only you can EDIT it to add more images, change
the title, GPS or perhaps to add it to more Projects.
BUT
– any other member of the Project can:
- Vote for it
- Add it to their Favourites
- Identify it – there can be
multiple identifications for the same observation
- Describe it
- Comment on it.

BowerBird has its own Master Names Checklist for the Australian biota - covering 7 Kingdoms and approximately 210,000 individual species names.
You can enter text which will return any scientific or common name with the text words you have written.

Or you can work your way down a hierarchical classification.
Once you select a species, it will pop into the box above giving the species' full taxonomic classifications as well as all available common names.

At
present, the way to Comment on an Observation is through the Describe
button. Unfortunately, you must add a Tag and Comment for it to be saved.

Viewing Projects
When
you first open a Project,
the view is the Timeline View which shows you all of the activity for every
record – very long winded and meticulously chronological.

However,
if you click the Sightings button, then you get a Titled View of each
observation only once.
If you
click the Sightings button, you will get a tiled view with all of the activity
for each record stored inside a single entry.
To open
any observation, just click on the Title name.


Or you can
open the taxonomy module to look at any Kingdom, Class, Order or as in this
case I wanted to look at just the Skipper (ie. Hesperiidae) eggs:

Anyone at
any time can decide to add a description to the Observation:

This opens an “Add a Description” drop down box and you can
chose which category best fits your descriptive text.
There are
a range of options. This is where you could note behavioural attributes
of a species such as your described earlier seeing a species for only a few
months of the year while other you see all year round.
In
BowerBird, we can have one or more images of the species but we can have
continual updates of the life cycle of the species through users continually
adding notes to the single Observation.

Click
on the Observation TITLE to open the Observation and see all of its contents.

Good luck
and Enjoy!
Throw me
any questions at kwalker@museum.vic.gov.au
I have
also started a BowerBird Help blog which also answers questions. Here is
the URL: http://bower-news.blogspot.com.au/
Cheers,
Ken